mommy's style

mommy's style
mommy's style

kumquat's style

kumquat's style
kumquat's style

shop our closet

shop our closet
shop our closet
Showing posts with label tutorials. Show all posts

diy for the epicly unskilled :: jeans to shorts


I've been itching for a pair of black denim shorts this summer, but a new self-imposed hiatus on shopping has temporarily put a halt to new acquisitions. I did, however, stumble across an old pair of black skinny jeans a few nights ago, and decided I should try my hand at DIY by attempting to turn them into a pair of shorts.

Now, when it comes to DIY and craftiness, my sister is the skilled half of this pair. She has dozens of books filled with instructions on how to make some really cool shit, and she has this innate ability to use her own brilliant creativity to extrapolate on these projects, making them infinitely cooler and prettier.

What I lack in talent, I make up for in sheer, bullheaded audacity. I have a tough time following (or understanding) directions - I have to do something for myself, or I just don't get it. I form a picture inside my head, and then start brainstorming the best possible ways to make it happen. Sometimes, that vision translates perfectly into the real world on the first attempt; but most of the time, it requires quite a bit of tweaking before it can be termed a successful venture.

So when I asked Princess if I could borrow her room (she has the best lighting in the house, though, as evidenced by these photos, still not exactly adequate) for a DIY tutorial post experiment, I'm sure you can imagine the look on her face. She was nice enough to acquiesce, though I suspect it was more out of a morbid curiosity than a desire to be helpful. She even helped me document the experience for your enjoyment – see the fruits of our labors below, and if you're too lazy or don't have the goods (or just needs some inspiration), check out these ready made options:

Dorothy Perkins ($21, slightly longer length)
MinkPink ($72, distressed, slashed & high waisted)
Marc Jacobs ($98, classic cut with raw edges)

the goal:
turn these black skinny jeans into cuffed shorts


step 1 :: acquire supplies
  • 1 pair of jeans; I used black skinny jeans, but you can (obvs) use any wash or fit you like. Your choice of jeans depends on what you have lying around and what you want your shorts to look like. You may want to experiment on a pair you don’t love before moving on to the real thing.
  • Something to mark fabric with; I used a chalk pencil from one of my sister's art sets, but if you're not lucky enough to have a sister with every crafting/art tool known to woman, you can also use a regular marker or steal a piece of sidewalk chalk from one of the neighborhood kids.
  • Sharp scissors; this is important, because old/dull scissors won't cut through denim very easily, let alone the heavy seams.
  • Something to measure with; a tailor's tape measure is best, though anything that goes up to about 18" will work.
  • Some space in which to work. My sister’s twin size bed and multiple lamps made an ideal work area for me.

step 2 :: prep work
The most important part to getting this right is to lay the jeans out as flat as possible before measuring and marking them. OCD types may want to iron them, but non-perfectionists such as me can just smooth them out and hope for the best. Pay attention to the waist band though; on jeans, the front typically curves down lower than the back when they’re laid out flat. I’m sure it has something to do with the cut, but make sure the waistband is even across the front and back.


step 3 :: measure and mark it
Take your measuring device of choice and first measure your leg to the spot where you want your completed short to hit. If you already have a pair that is the ideal length, you can measure those to use as a guide. I decided to cut mine off at 18”; this puts them at my knee, but I like the extra length because I can roll them and they’re still an appropriate length for the office. Whatever your choice of standard, add three to five inches (you can always cut more off, but it’s pretty hard to add it back on) and measure down the leg, starting at the top of the waistband, and mark each pant leg appropriately. A small mark will suffice if you’re confident you’re a straight cutter, but us mere mortals may want to mark all the way across the leg (just the front is fine).


step 4 :: snip, snip
Pick up scissors. Cut along line.
Note: Go a hair above the line if you used a marker that won’t wash out.


step 5 :: try them on & make adjustments
Once you’re done trimming, pull them on. Make sure the new edges are straight-ish, but they don’t need to be perfect. The beauty of unskilled DIYs lies in the imperfections. This is also where the extra length comes in handy, because you can make adjustments to the length as necessary, and even roll them up a bit to conceal a bad cut or give it a cleaner look. If you need to make adjustments, mark where you want to cut and snip carefully (after you’ve taken them off, though, k?). Once you’re done and have them rolled into place, you can use double stick fabric tape or iron them for a sharp fold and a crisp look, or just let them be for a lazy low maintenance, carefree look.


step 6 :: and… done!
This turned out to be a lot easier than I expected it to be, and I’m pretty proud of the results; look for outfit photos this weekend. Let me know if you try it out by sending me a picture of your new shorts and stay tuned for a possible part two, involving studs, a hot glue gun, umpth degree burns and (hopefully) better photography.
2

funny story + pretty make up + tutorial =

Work was awesome today - in a wildly busy, crazy productive, hilariously funny way. Have I mentioned recently how much I love my job and my co-workers?

The highlight of my day was locking my keys in my truck at the gas station on my lunch. I nearly panicked until I remembered that I hadn't latched the sliding back window all the way the other day; I climbed up in the back of the truck, was able to slide the window open about a half inch, and used a twig to push the latch open so I could open the window the rest of the way to dive inside and get the keys. The funny part? I was wearing a semi-short (a few inches above the knee) skirt. Jack (formerly known as Boss Man - he nicknamed me Liz Lemon, so now he's Jack Donaghey) said that if he finds the video on YouTube, he'll be sure to let me know.


So right about now, I imagine you're asking yourself something like: why this silly blogger is sharing photos of herself with crummy lighting, PJs and a top knot that's pretty much only appropriate for washing one's face?

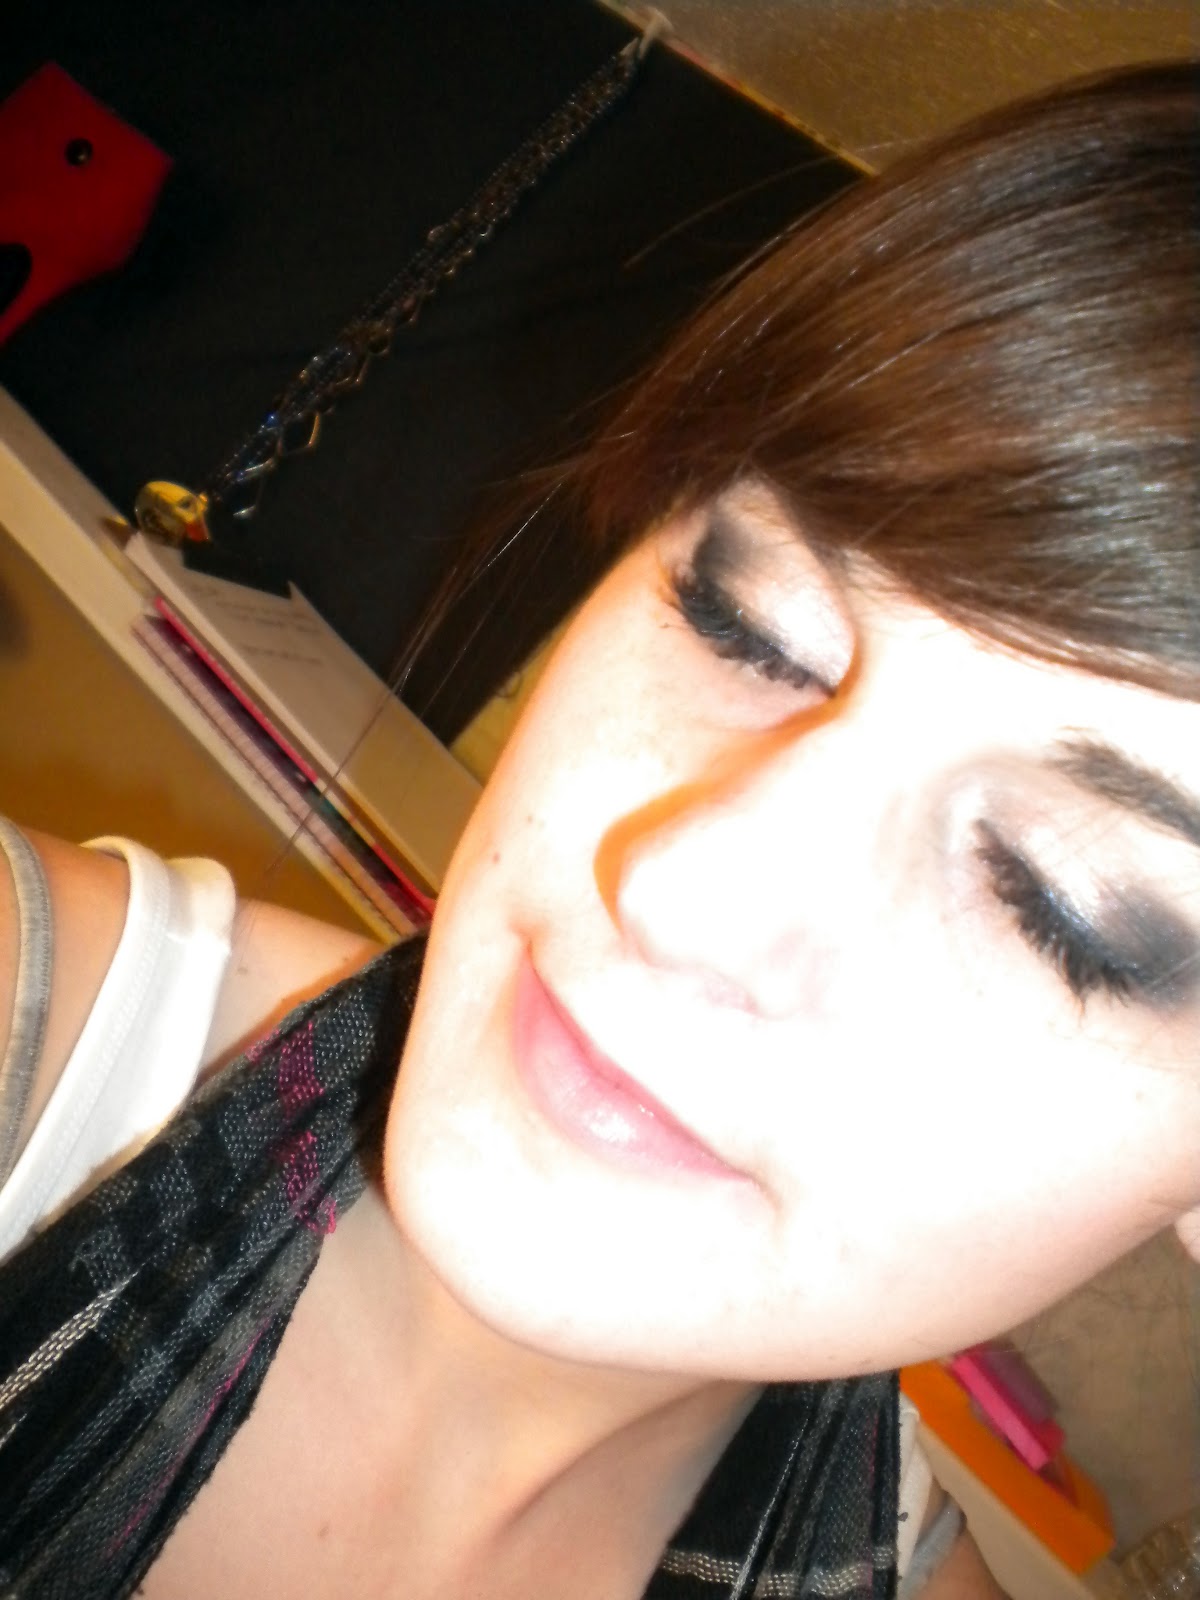
The answer, dear friends, is that I am sharing these only mildly flattering photos because I want to share my awesome eye make up look with you. It may appear to be a regular ol' smokey eye, but there are a few things that set today's smokiness apart from the norm:

1. It happened completely by accident.
2. It happened as a result of a mistake.
3. The best part: I created at work, in a hurry, using nothing more than a black eye pencil, a blending brush, a tiny bit of shimmery pink shadow, and a bad ass mascara.


If you're still reading, I'm going to assume that's it's because you're interested in finding out how I stumbled upon this oh-so-sexily simple look (hint: to see the full view of the finished product, skip toward the bottom). I've never considered myself a pro at make up application (pretty much everything I know I've learned from magazines, YouTube, or came up with myself), but I love to experiment and try new things with my make up application techniques. I've had to teach myself everything I know, so I'm always looking for ways to improve (this is why I'm so obsessed with make up brushes, btw). Today was the first day that I've done a smokey eye using black that I didn't look like I had a black eye, so I'm pretty darn proud of it.

I'm done bragging though - here's the low-down; I've even italicized the names of the products that I use, and included links where I can. I'd like to note that this is not a sponsored post.

Step one: Everything else.
I always do my eye make up second to last - this way if I'm running late, I can just swoop on some liner and mascara and run out the door; lipstick comes after, which I can always do at work. I'll run through this part of the routine super quick like, since it's not the focus of this post: I start off by moisturizing, using Clinique Dramatically Different Moisturizer for dry skin; then I prime (MakeUp Forever HD Microperfecting Primer); after which I conceal (MakeUp Forever HD Invisible Concealer in shade 310); then I lay the foundation (MakeUp Forever HD Foundation in 110). 


After I apply foundation, I usually add a tad more concealer as needed. I also like to blend some foundation and concealer over my lids and under my eyes to cover the serious dark circles I have going on (due to intense sleep deprivation). It's important to let the foundation and concealer dry completely before applying any other products, but it's best to set it with a powder (I like MakeUp Forever HD Microfinish Powder, applied using the MakeUp Forever Kabuki Brush) before moving on to step two.

I usually add a few dots of pearly pink highlighter to the tops of my cheekbones, my brow bone and cupid's bow as well. Dollface by Hard Candy is currently my go-to shimmer, but I'm considering trading up and trying out something by Nars or Benefit High Beam. I apply powder blush with a round brush - my current favorite is Girly Show, from the TooFaced In Your Dreams palette.


Step two: Prime! 
Seriously, priming your lids makes your eye products stick for soooooo much longer. If I don't use primer, by the end of work I usually have eyeshadow shimmer all over my face but no color in sight, and eye liner smudged like crazy - I look like a fairy raccoon. I just started using Urban Decay Primer Potion in original formula, and it's one of the best and is probably the most recommended eye primer out there - it's also $19 for the smallest bottle available at Sephora. A tiny bit goes a long way, and in my opinion it's worth it. If you're looking for something a bit cheaper though, Hard Candy Eye Shadow Primer is available at WalMart and works just fine for much less.

Important: let primer dry before applying any product!


Step three: Pink shimmer shadow
Dust a shimmery pink shadow all over your lid and into the crease. I used Pink Peacock by TooFaced (from their In Your Dreams palette). Pressing it gently into your lid with your finger will help it to stay in place better than sweeping it across with a brush. For extra drama and shimmer, you can dust a tiny bit beneath your lower lashes as well.

Note: when you get palettes like these, I suggest you leave the plastic over the lipgloss so they don't get eye shadow in them.

This next part is what I discovered by accident. I was trying to just line my eyes and smudge it a tiny bit, but I got a bit carried away and messed things up. I decided to go with it, and it turned into a smokey eye.

Step four: Smoke your eyes
This is the tricky part, where it can go seriously wrong. I'd be willing to bet that it'd be pretty difficult to get such a lovely smokey effect with just any eye pencil. I used Urban Decay's 24/7 Glide On Pencil in Perversion (matte blackest black), and I highly recommend it (if you're a beginner, maybe go for Zero instead of Perversion). It gives you about 30 seconds of play time before it sets into stone on your eyes (not literally, obvs, but you get the idea), and you can do some pretty fun stuff in those 30 seconds. I also recommend getting the 24/7 Glide On Shadow Blending Brush; it makes smudging the pencil infinitely easier. All of these products are pictured just above the palette, with the primer.

The technique: line top lid with a thin line of pencil. Run brush along entire line to smooth and blur; when you reach the outer corner of your eye, blend the pencil up into the crease and across the outer third of the lid using circular motions, going towards your nose. Add more liner as needed to get the desired effect. When you've reached the desired level of smokiness stop. Then, line waterline on lower lid; if you didn't dust pink shadow across bottom, you can lightly run brush beneath lower lashes to add a bit of smoke to the bottom.

When smoking your eyes, remember that you want soft, blurry lines, not sharp, intense ones.

Step five: lashes!
I love, love, LOVE mascara. I currently own at least seven different tubes, of various brands, formulas and prices. I'm getting a new one tomorrow, and once I've given it a shot, I'm planning to post a review of the different ones I've tried.


ANYWAY, back to the tutorial… Next, apply mascara. In these photos, I used Dior DiorShow Blackout Mascara in kohl black - my absolute favorite. The technique:

1. Comb lashes using lash comb.
2. Remove mascara wand from tube, wiping excess off inside tube.
3. "Lock" wand into base of lashes - you'll get what I mean by this when you do it. Basically, get it as close to the base of your lashes as you can, and jimmy it in between the lashes there. Then, apply to lashes in upward, zig-zag motions. I would recommend 2-3 coats, depending on what kind you are using and how new your tube is. I usually to 2-4 of my Dior. To make lashes appear even longer, apply extra mascara to ends of lashes. When finished, use lash comb to separate lashes and remove any clumps.

NOTE: I don't usually use a lash curler. I like to give my lashes in a less torturous way, by pushing them up a bit after I've applied mascara. It doesn't give quite the eye opening effect of a curler, but there's zero danger of pinching!

Step six: color your lips.
In these photos, I'm wearing Centerfold by TooFaced - it's a pinky-beigey nude. The number one rule of make up is that only one part of your face should be dramatic; with an intense smokey eye like this, it's better to keep cheeks and lips toned down. I was wearing my MakeUp Forever Rouge Artist Intense Lipstick in shade #33 earlier though - for a bright bubble gum pink, it actually still seemed to work with the dark eyes.


Step seven: congratulate yourself on a job well done.
Seriously. You look hot. You deserve to go shopping.


Ta-da! The finished product.

Here are some photos of the brushes I use on a daily basis. The pink roll I recently picked up from Sephora for $60 (find it here) - a great deal, and the brushes are pretty good, but I definitely want to get some professional quality brushes at some point in the near future; if not a full set, then at least the basics (foundation, concealer, blush, blending, etc...).


The double ended brushes are meh. They work okay, but they're not the best. In fact, I used the smudge brush (the short stubby one) and it actually kinda hurt. Not worth the $18 each I spent.


I hope this makes sense, although since it's my first make up tutorial, I realize that it's entirely possible that parts of it don't. If you have any questions, feel free to ask in the comments or to email me. If you're interested in a video tutorial, let me know in the comments and I'll put one together.
6
Back to Top